28
Autumn
(lemmy.world)
Well, one symptom of it anyway - sunlight on dew on webs. Reading, UK

To tell you something you probably already knew, your depth of field is too short in this one, and you needed to increase the aperture or move back, so that you get the full glory of the fluffiness on the right.
Really nice subjects, though!
Interesting to see a technical use of photography posted here.
And good tutorials you'd care to recommend that explain what they are trying to achieve? I just have a self taught process with Canon's DPP4 on RAW format, only working on brightness, as follows:
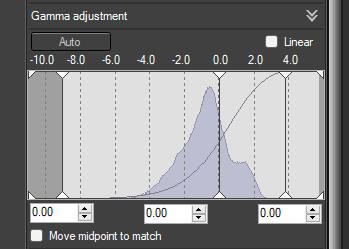
Doing this, you make greatest use of the range of tones (shades, whatever) that the end JPG can offer, and get the detailed tone changes in the zone that matters... maybe.
Using the general brightness slider achieves similar but distinct effects - you might mix and match
This sort of activity should work in any tool. You might be able to do it for selected areas or colour, but I don't/can't. You might be able to tweak the curve more precisely, but likewise I don't try.
Those are the tools to play with (might also be called Gamma Adjustment), but I think in this particular case, because of those lovely areas where the sun is shining through, having the rest of the body dark (and the sky bright) works really rather well.
If you know the focal length, good - I just remember the first time I went well below 50mm!
You know the events and their constraints: I mentioned it because the monopod is just to provide a rest, and not actual support it can be really light and collapse down pretty short. Sort of thing that can dangle from a belt.
And enjoy the party!
Advice you are probably already aware of (as IAMALlama has already given excellent technical advice):
Nice to see the highlights on the feathers.
On time taken to think - it's more the bittersweet admiring/wondering at wildlife vs. remembering what this weight in my hands is for!
On a related note, getting over the embarrassment of using burst mode freely (rather than working on having perfect timing) has definitely helped.
On swapping focus modes - that's almost down to instinct now, my fingers know where to go and how many times to press.
Sorry - been away for a few days.
Your advice is good, but mostly already known to me. For birds, it's rare for the bird to fill the frame on my 600mm lens, never mind a 200-800mm zoom - so it's cropping that's important. Shutter speed - as high as the light allows :) Generally around 1/1000s on the zoom, faster on brighter days. I walk around with the camera on: my walks are rarely more than an hour at a time, so no chance of flattening the battery (and a spare is carried) - the time is just noticing the bird, thinking "I want to photo that" (which takes remarkably long at my age), actually getting the bird in the frame (one major draw back of long heavy lens, and the real time killer), and then waiting for AF to kick in.
I seem not to be using manual focus these days, just single point auto-focus for birds in a cluttered shot. I think manual focus would be more relevant in an hide and/or with a tripod: the time to focus manually means the bird better be still or I need to know where it will appear.
I dodge most black/overexposed issues by shooting in RAW (so far more forgiving) - though I do use exposure compensation when shooting birds against the sky.
Thank you for the content and effort put into that reply, you are generous.
My main interest is wildlife, and because I so rarely get more than a few seconds of shooting on any subject (and many that entirely get away before I notice, align lens onto subject and auto-focus does its thing on what I'm after) so I don't have large numbers of photos from a walk so the culling process is not that bad.
I certainly agree that high ISO is not, in and of it self, a guarantee the photo is no good, though there is some loose correlation - and your cat photo makes the point well.
I'm just wondering whether your approach might be used to give pointers on how to balance settings "when every second counts", and there's a lot to be said for just taking the shot regardless. But, as ever, really I ought to just try it myself and see!
This is hardly a high traffic group. I'd recommend just posting away until someone complains, and then invite them to create a regular Questions thread (which seems to be a proven approach for all I find them rather missing the point of this format).
Canon R6 + RF 600mm F11
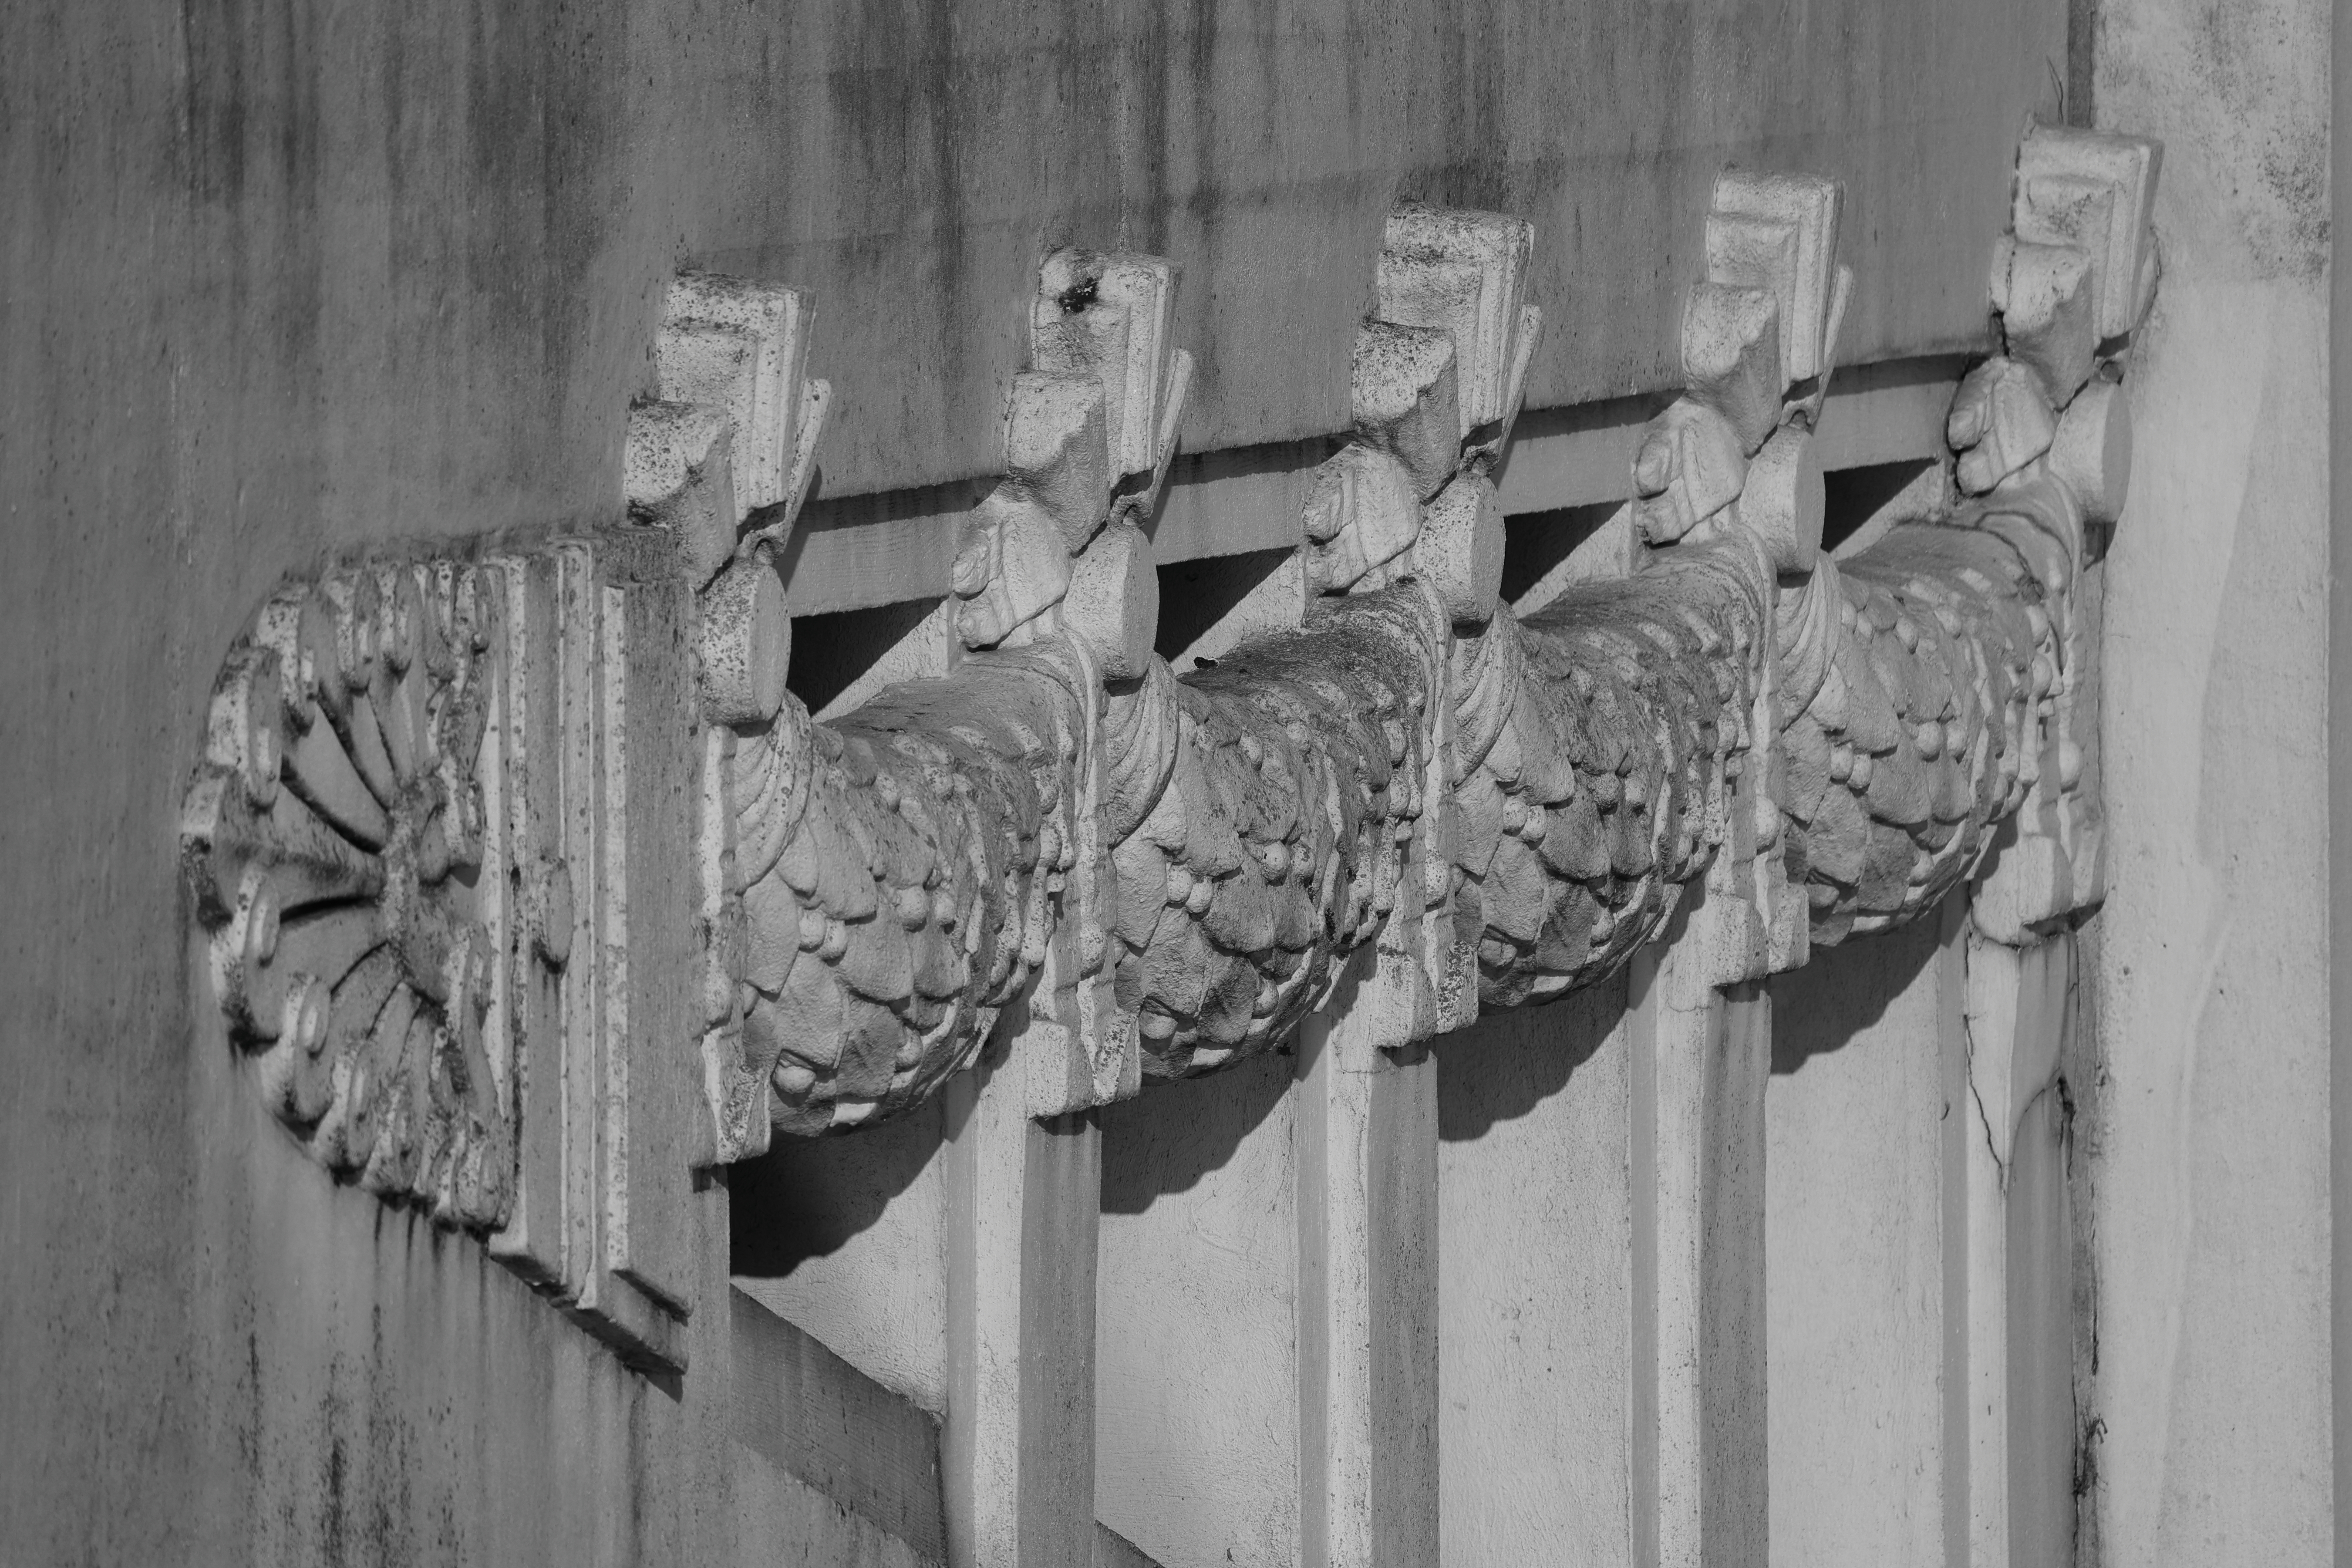
Black and white because feels better than a sort of golden yellow, and because I was being unkind about some who post B&W photos so ought to give them their chance too.
Canon R6 + RF11 600mm
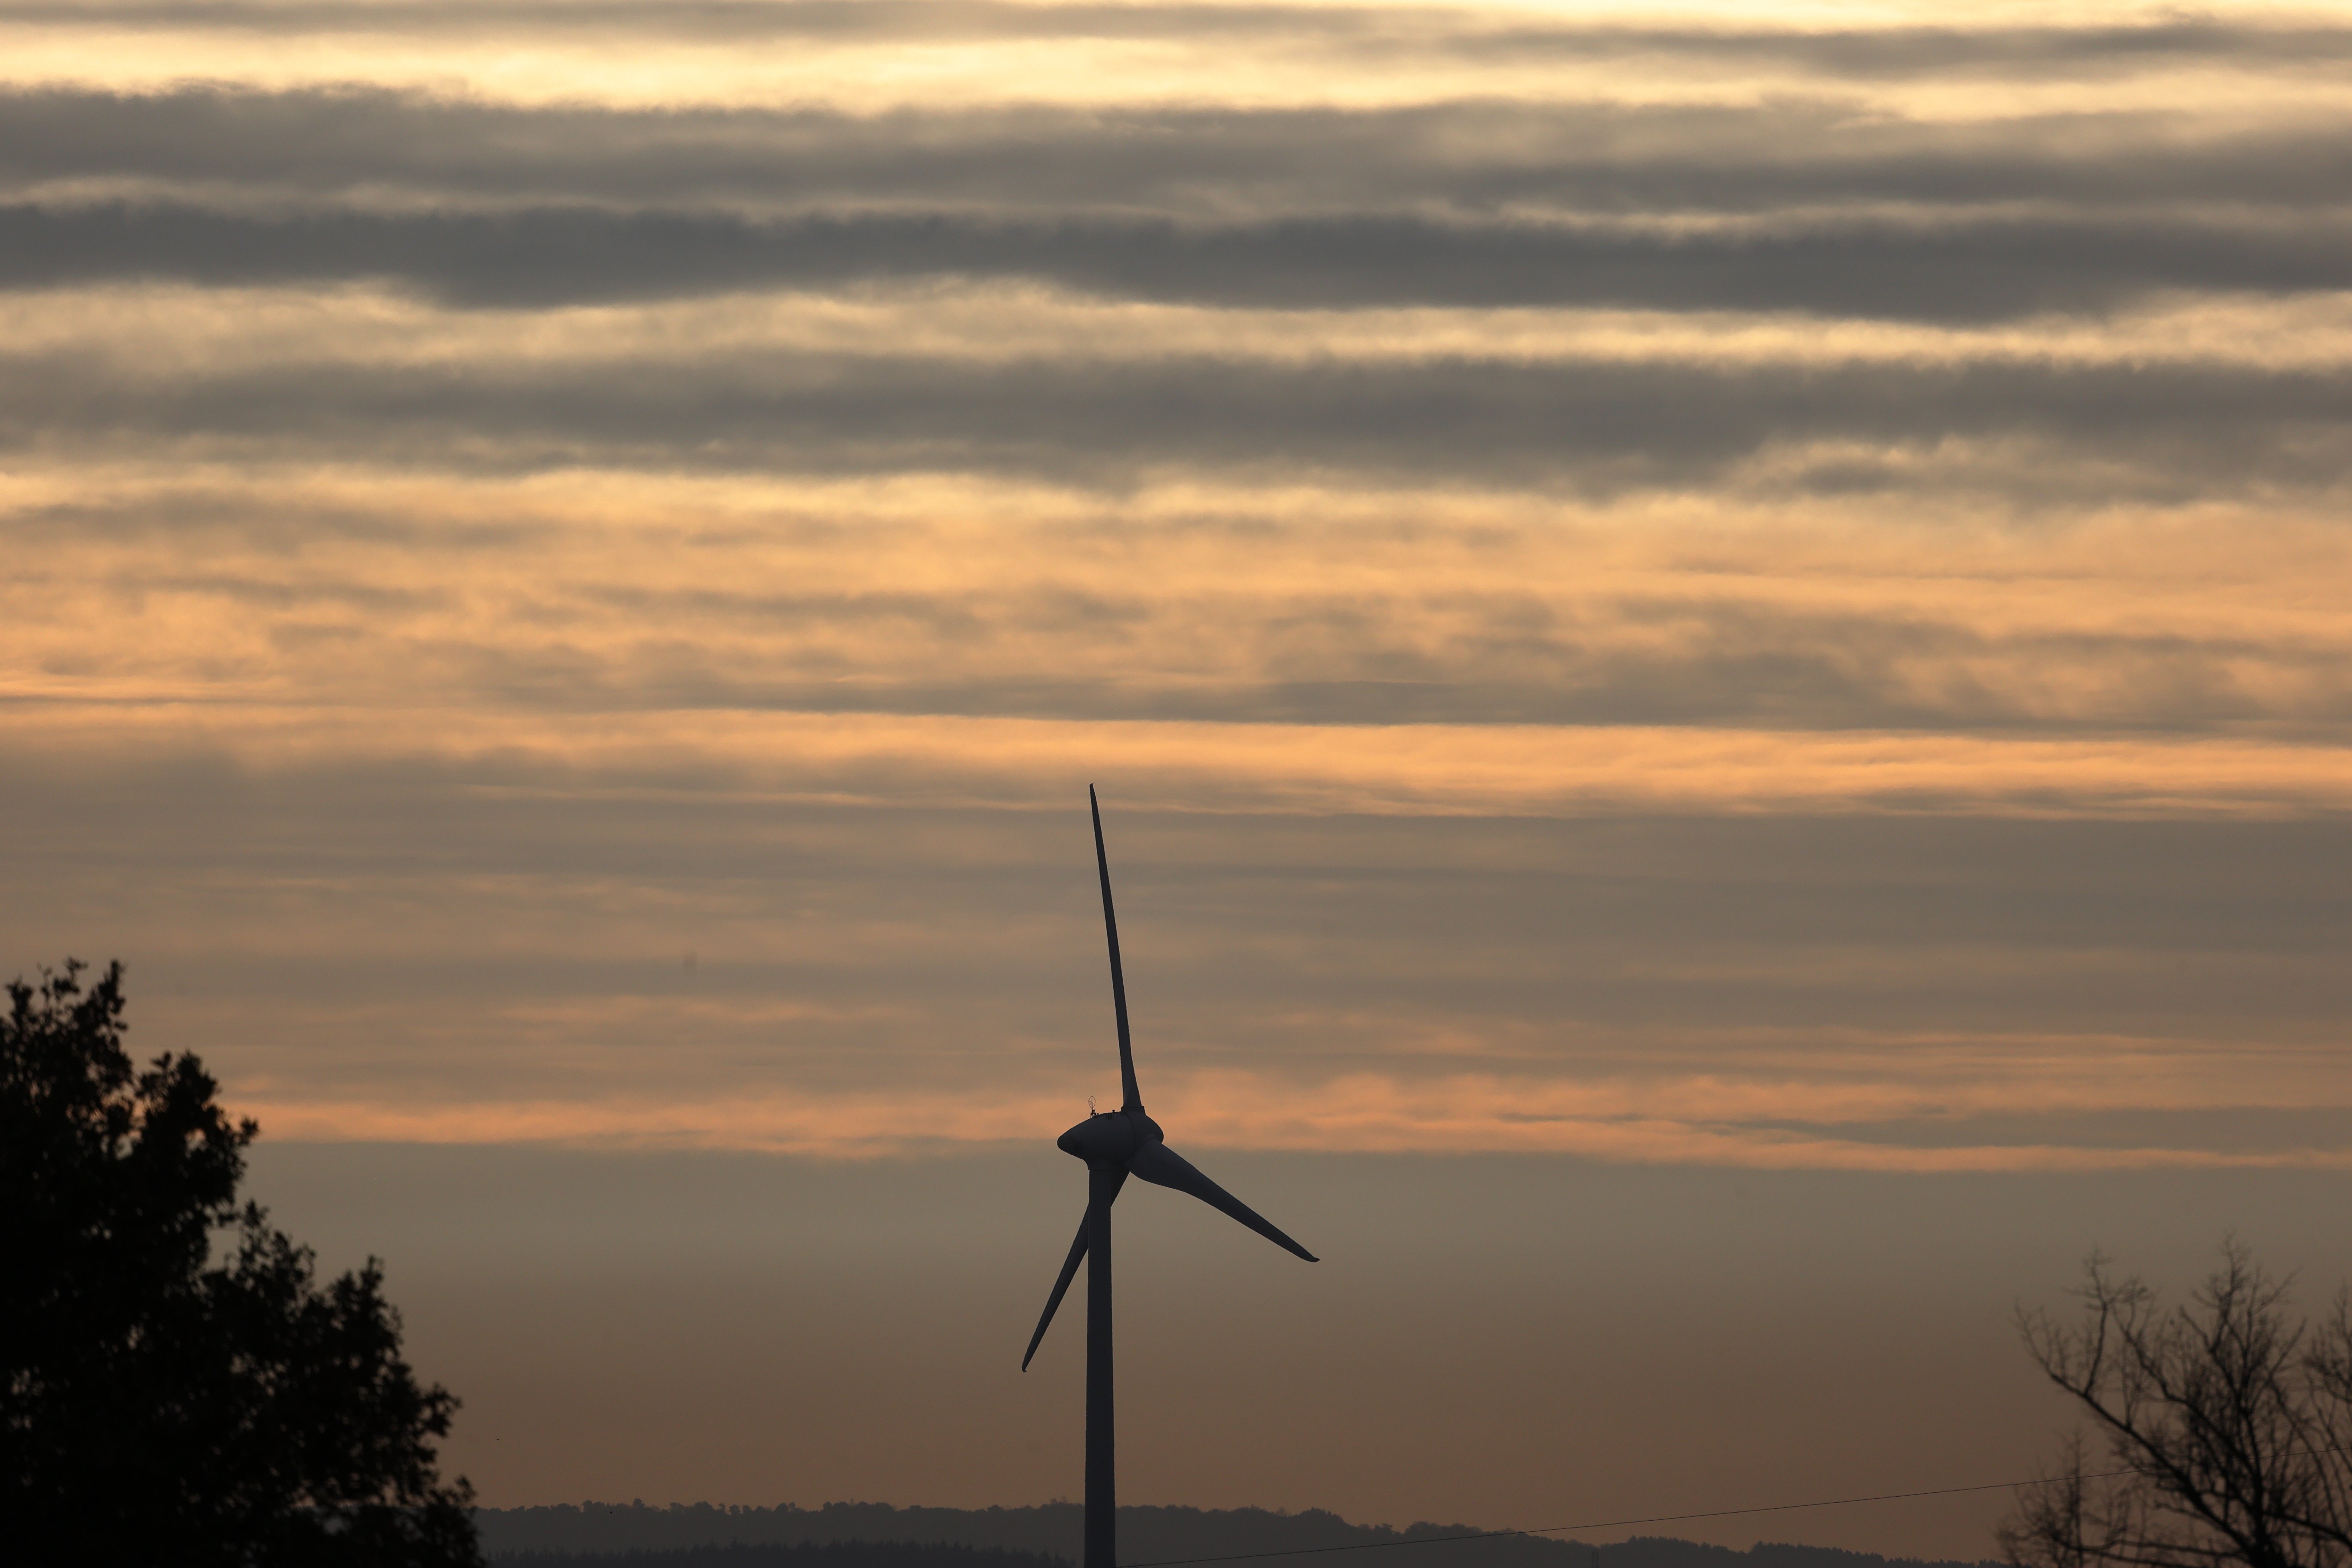
The clouds really deserved a much wider angle lens, but all I had was my bird photography lens, and a mildly interesting central subject to take a slice of the magnificence as my shot.
Polarising filters or using a tripod and a much slower speed (this was at 1/1000s - slow for birds, far too fast for this) might also have sharpened up the clouds.
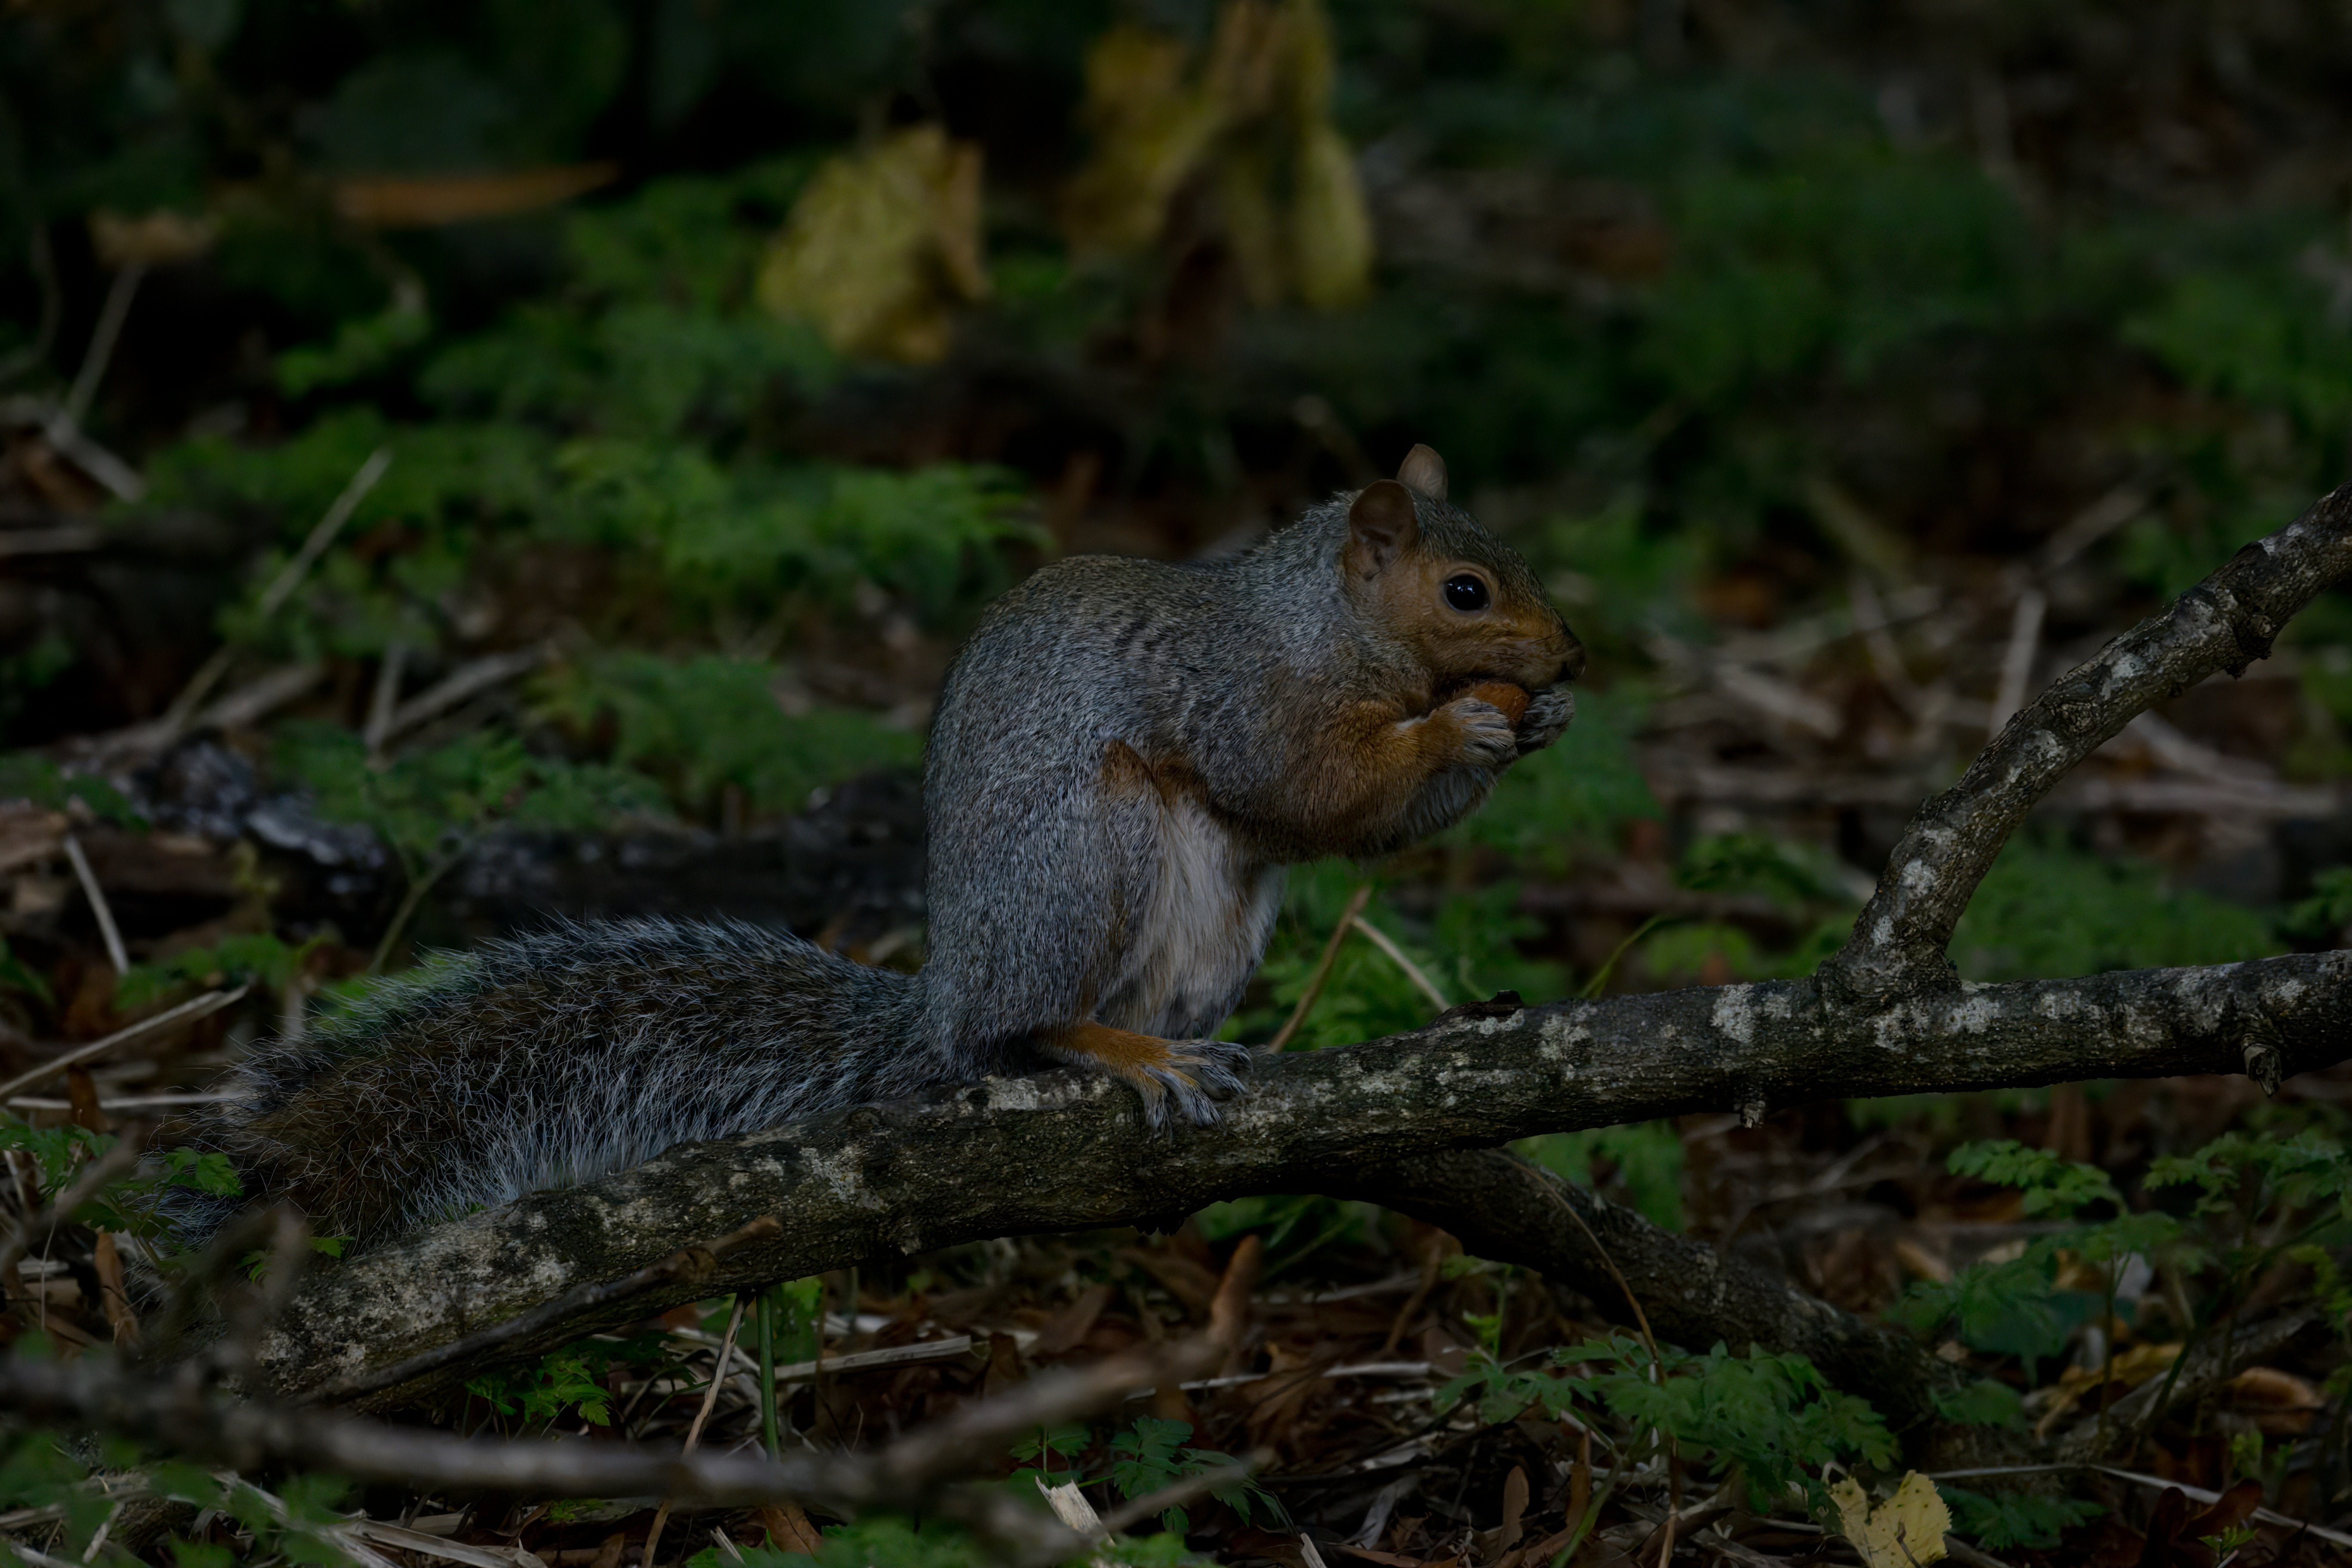
I just took this grey squirrel photo on the off-chance, and was rather pleased that it came out pretty well. ISO25600 is far from ideal, and it has been got at by Topaz AI (which, when it works, definitely works!).
Canon R6 + RF 600mm lens
Kept dark as it seemed to suit.
Reading, UK with a Canon R6 + RF100mm lens
Not anything as intentional as it appears - I just saw the shadows of the mid morning sun providing a natural frame/vignette round the well lit lock, and took the shot.

Oh yes, and also of only realising in post-propressing that the shot isn't quite as good as you hoped when you did it.